Saturday, August 23, 2014

Small batch canned tomatoes.

My garden this year is producing a decent number of tomatoes. Not so beautiful, but I would like to save them. Every year we use a lot of cans of tomatoes for pasta sauces. I thought it would be nice if I could can my tomatoes and hopefully save money throughout the winter.


I used a recipe from Simple Bites. It was easy to follow, although for my first batch of tomatoes I made the a couple mistakes.
First I always get quarts and pint jars mixed up since here in Japan everything is labeled nicely with ml. So I added too much lemon juice.
Second I added the lemon juice on top of the tomatoes, which is what the recipe recommends. However this goes against the USDA guidelines for canning tomatoes which call for the lemon juice to be added to the jar first.
Third, as you can see from the picture below, I put the top on too tightly on one of my jars, and the bottom exploded.


I was glad it was a half pint that exploded rather than my pints.

There was a fair amount of liquid lost from a few of the jars, but after doing a bit of research online this seems to be fine.

Update: Since I wrote this post I put up another 5 pints, without my previous mistakes.

Monday, April 28, 2014

Munton's Yorkshire Bitter Brew


I recently bottled my Black Rock lager brew, so that means its time to start my next batch!

This time I ordered Munton's Connoisseurs Yorkshire Bitter. I have never actually had bitter before so its going to be difficult to tell if my beer comes out well or not.


I did my brew according to the kit instructions. I used regular sugar since I still haven't gotten around to buying any corn sugar.

Unlike my first brew, my black rock, this time I pitched the yeast at 26 degrees. It wasn't as quick to start, but once it got started it went crazy.

The kit is designed for 23L, but since my tank can hold, when completely fully, only 24L I ended up with a final volume of 22L. Even with 2L of headroom the yeast went crazy and I got some crazy blowout from my air lock.

I went down to the local Homac and bought some tubing and fit one end into my bung and the other into a can of sanitizer. The brew went crazy for two days. Now it has settled down (day 3) and I am back to using my air lock.

The yeast seems much more active than the black rock kit.

My second time around was much easier than my first. I already had my sanitizer mixed up and so the whole process took me less than an hour to get it started.

Sunday, April 6, 2014

Beer Brewing

Recently I have decided I want to try my hand at brewing beer and wine. Ultimately I want to brew wine as I have wanted to brew wine since I was a middle school student. Unfortunately brewing wine is a bit of a process and needs about a year when you consider the bottle time.

About two weeks ago I was talking with a friend and decided that brewing beer would be a good start.

I ordered a starter brewing kit online, and also a sanitiser.

I decided to use star san. It is no rinse which means I can soak or stray it onto my equipment and be ready to go.
1 ounce is used to make 5 gallons. So after some thinking and doing a bit of math I ended up making 5L. I used 9ml of the star san concentrate and 5L of water. After making up this batch I realised that this is a ton of sanitiser. Far more than I really need. But I will know for next time.

I covered everything with sanitiser and got started.


I used my stock pot to heat up 5L of water. To this I added 800g of plan white sugar. Corn sugar is the best to use, but I need to order it online, so I decided to just go for white sugar. If the taste is lacking from batch two I will change to corn sugar.

To my stock pot with water and sugar I added the contents of one can of malt extract.

This brought my total volume up to about 7L. This was actually too much boiling liquid. But I moved this into my fermentation tank and added another 14L of water. My temperature was still to high at 30 degrees, so I put my tank in the sink with cold water and got the temperature down to 28. Then I added the yeast and set the tank up in the spare room to ferment.

I covered the tank with an old t-shirt. Hopefully this will help maintain the temperature and also keep the beer from getting skunked from light getting into the tank.


In about two weeks it will be time to bottle!

Update: 24 hours later and my beer is bubbling. Looks like everything is underway. Just need to wait a week or so for it to finish up.

Friday, January 21, 2011

Candied Clementine Peels

After making clementine marmalade I still had a lot of clementines, so I decided to try candying the peels for use in baking. Here is what I did:

Ingredients:
4 clementine skins, cut into 12 slices.
salt
1 cup Sugar
1cup Water
Sugar to coat candied clementines
Drying rack
Oil

First halve the clementines and take off the skin, cut into slices. Put into a pot with water and 1 tsp of salt. Boil for 10 minutes, wash, and repeat.


Boiling the peels in salt water helps to take off the bitter edge. After boiling twice wash well.
Bring 1 cup water and 1 cup sugar to a boil, and add peels. Continue boiling for 45 minutes to an hour. Or until the peels turn clear.


After they turn translucent, take out and put on an oiled drying rack and let dry for 30 minutes.
Next, toss in sugar to coat.

These peels can be kept in an airtight container for about 6 months.

They can be eaten as is, but they are still a bit bitter. They will taste good when used for baking. I hope to make a chocolate tart and use these peels.

Tuesday, January 18, 2011

Clementine Marmalade

I got a big bag of Clementines that were left over from school lunch. I have been trying to think of interesting things to make with them, so I decided to make some simple marmalade. It came out really well, but it should be noted that clementines are VERY strong in flavor, some people may find it over powering.

Ingredients:
8 Clementines, washed.
2 cups Clementine Peel
1/3 Lemon Juice
3 cups Sugar
Water

First wash the clementines and remove the peel. Slice thinly. You should have about 2 cups peels. Boil this for about 30 minutes or until soft. Strain and set aside.


Put the clementine fruit in a blender and blend until smooth.

Combine:
2 cups Boiled Peels
2 cups of blended clementine pulp
2 cups Water
3 cups Sugar
1/3 cup Lemon Juice


Bring to a boil and cook until the marmalade hits 220 degrees, or the pectin activates.
Process in a water bath canner for 10 minutes.
 
This should yield about four jars of marmalade.

This clementine marmalade has a very strong flavor. I think in the future I will boil the skins longer and wash more thoroughly before using.

Wednesday, December 8, 2010

Easy Cinnamon Rolls

Today I was in the mood for some simple cinnamon rolls. I searched the net and found a couple decent looking recipes. I came up with this:

Dough:
1 cup all-purpose flour
1 1/2 tsp baking powder
1/4 tsp salt
1 tbsp sugar
1/4 cup shortening (or butter)
milk
Filling:
butter
3 tbsp brown sugar
3 tbsp white sugar
1 tsp cinnamon.

Sift the dry ingredients together, cut in the shortening. Add milk little by little until you have a nice dough. I used around 1/4 cup milk.

Roll out the dough on a floured surface to a rectangle with 1/4 inch thickness.

Spread a layer of butter on the dough, mix together the sugar and cinnamon and spread evenly over the butter dough. Roll up the dough, then cut into 1 inch pieces.

Place on baking sheet and cook at 210C for about 12 minutes, or until they are slightly browned.


If you want to glazed them, make this simple glaze

Powdered sugar
Milk
Vanilla extract

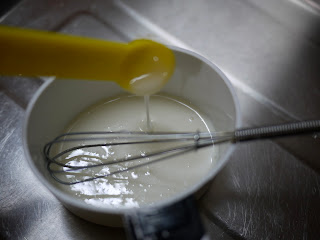
I used 1/4 cup of powdered sugar, added a few drops of vanilla extract, then about 1 tsp of milk.


Dibble the glaze over the cinnamon rolls and enjoy!


These took only about 30 minutes to make. Really simple, they are very flaky. I might add an egg or knead the dough more the next time I make them.

Edit: I made these again and used half bread flour, half all purpose flour and kneaded the dough a bit and they came out much better.

Thursday, December 2, 2010

French Onion Soup

I have seen tons of onions at the store recently. So logically following that, I decided to try making french onion soup.

This soup was pretty easy to make, it took a lot of cooking time, but the active time was pretty short.

What you need:
5 onions
1/2 cup butter
1/3 cup flour
1 tbsp paprika
2 tsp black pepper
1 tsp seasoned salt
1 bay leaf
3 tsp sugar
3 cups soup stock
1 cup white wine
Sourdough or French bread
Cheese


(1) Peel and cut the onion into fourths, cut into 1/8 inch slices.

(2) Melt the butter in a big soup pot, add the onions and cook on low heat until the onions are completely soft, this should take around one hour.


(3) Add the paprika, black pepper, seasoned salt, bay leaf, and sugar. Mix in the flour. If you want a thinner soup you can omit the flour.

(4) Add the white wine and soup stock. Beef broth is best, but you can use whatever you have handy. Cook for another one or two hours.

(5) Put the soup in the refrigerator overnight. Put in a bowl, with a slice of bread, then cheese and put in the oven to heat up and melt the cheese.


Beef broth is what will give your onion soup its nice color. If you don't use beef broth you can use caramel color or food coloring. I didn't use anything and my soup ended up looking a bit orange. It tasted really yummy though.